Showing posts with label parties. Show all posts

Friday, November 20, 2009

Scotcheroos


Guess what? I was featured on Little Birdie Secrets for their virtual cookie exchange! I feel so honored. Thanks, Little Birdies! All the other cookies look delicious, too. I am grateful for some new recipes to try this holiday season. Can't wait to try them!

Here's my recipe for Scotcheroos:

Ingredients:

1 1/2 C. creamy peanut butter
1 C. light corn syrup

1 C
. sugar
6 C. rice krispies cereal

1 2/3 C. butterscotch chips*

1 C. sem
i-sweet chocolate chips*

*(You can adjust the amounts of the chocolate and butterscotch chips to your liking. For example, if you
aren't a big fan of butterscotch these are still good when you switch the measurements of the chocolate and butterscotch.)

Coat a 9x13 pan with non-stick cooking spray. Combine peanut butter, sug
ar, and corn syrup in a large saucepan. Cook over medium-low heat, stirring frequently, until melted. Remove from heat. Add cereal and stir until thoroughly coated. Press onto bottom of prepared baking pan. Microwave the butterscotch chips and semi-sweet chocolate chips together in a large microwaveable bowl on HIGH power for 1 minute. Stir. Microwave at additional 10-20 second intervals, stirring until smooth. Spread over cereal mixture. Refrigerate for 15-20 minutes or until topping is firm. Cut into squares and then triangles if desired. Makes approx. 20 bars or 40 triangles. Optional (and pictured): Melt additional dark chocolate chips and/or butterscotch and/or white chocolate, separately, about 1/4 cup each. Use spoon to drizzle stripes back and forth on the pan, with each variety. (I usually only use two different kinds.) Refrigerate again to let the chocolate harden. The scotcheroos pictured are with dark chocolate and butterscotch drizzled on top. I like the look of it better than plain, if I am taking to a party or giving as a gift. When I make them just for my family I completely skip the drizzled chocolate on top. It's yummy either way.


Peanut butter (I used crunchy), sugar, and corn syrup melting together in the pot.

The rice krispies mixed with peanut butter mixture, pressed into the greased pan. They're actually really good just like that. If you're pressed for time or short on chocolate and butterscotch, just serve these. Just warn people that they have peanuts in them... they aren't regular rice krispie treats.
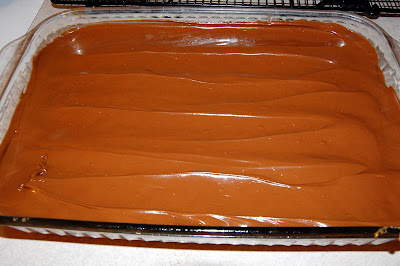
Topped with chocolate butterscotch mixture. Great just like that, too.

Just with butterscotch spoon drizzled. (It's a lame job of drizzling and ugly picture, I admit.)

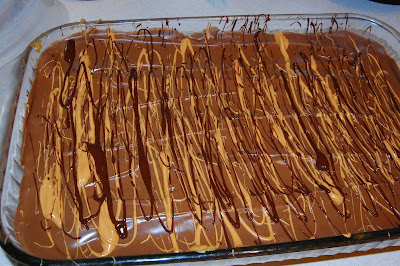
Dark chocolate and butterscotch drizzled on top. It looks really good (and tastes good too) with white chocolate drizzled, too. (Though, not really in addition to. That would be a bit much!)

YUM!
... And super easy. I usually cut them smaller than this picture shows. I would cut them in half. They're more bite size that way. (I don't feel as bad about eating them, then.) :-)

Monday, November 2, 2009

Busy Halloween Week

Three of my kids, with three of their cousins.


It's been a week since my last post, but it seems like weeks! We've been so busy that I feel like there should have been multiple blog posts from each day last week. There just never seemed to be any time to blog about things. Now, I guess I'll try to fit it all in at once and only share a few of the more interesting things that we did.

My baby chick. I need to send this to Little Birdie Secrets. I got the idea from them.

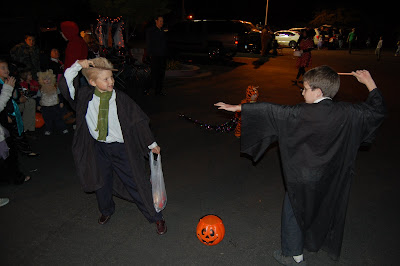
I stayed up so late one night making/altering this Draco Malfoy costume.


Preschool Halloween Party:


7-year-old birthday party on Halloween Day:

We did crafts and snacks. I think they had fun. :-)

6 and 7-year-old's use a lot of mod podge!


This pic is of the mummy pizzas before they went into the oven.

And... Our dinner and dessert last night:

We made these Stuffed Pizza Rolls from The Best Bites blog. (see my last blog post about them.) We used our own homemade pizza dough recipe (I should have my husband post that here on my blog sometime...) This was SOOO yummy! A bit more work (just took a bit more time to assemble) but WELL worth it! Really, dipped in warm sauce, it's so much better than pizza! You've got to try it! We'd like to try this one next time.


And here is my family's first ever Pizookie! We all just grabbed spoons and ate it straight out of the pan together! And of course we LOVED it! (We don't usually have dessert after dinner - in fact it's really quite rare here.) We DO usually make cookies on Sunday evening, though, and last night we decided to bake it a little differently! Thanks to some awesome friends for introducing me to these yummy creations! (I live in a cave, apparently!)

Monday, October 26, 2009

My New Favorite Food Blog

I absolutely love good food! Who doesn't?! I'm not exactly sure how I found this amazing food blog: Our Best Bites. But when I did, I searched around on their site for about an hour (I could easily spend tons of hours there) looking through some delicious recipes!! There are also some fun and yummy Halloween treats, perfect for a Halloween party. I personally was looking for ideas for treats for preschool this week, and my daughter's birthday party (that just so happens to be on Halloween).


I also can't get over their recipes for fall. They have so many great sounding recipes... like Pasta with Pumpkin Alfredo (Um, ya. I LOVE that idea), Pumpkin Spice Ice Cream Sandwiches (I've died and gone to heaven!), and Crumb-Topped Pumpkin Cream Cheese Bites (Oh, my)! I never really liked pumpkin when I was growing up, but just in the last few years I have completely fallen in love with it, in almost anything. I sorta like pumpkin pie (has to have a ton of whipped cream accompanying it, of course), but I REALLY like other pumpkin stuff. I think it all started when I was pregnant with my 2nd baby, 7 years ago and we stopped at Dairy Queen on the way home from a midwife's appointment (super far away). I decided to try a pumpkin pie blizzard that day. I've been hooked on pumpkin stuff like that, ever since!

Didn't mean for this post to get so long. I tend to ramble. I just wanted to share this wonderful site with you! Have fun browsing through their awesome recipes! And even more fun making and eating your creations!

Don't know yet what I'll be making... first....

*On a side note: Anyone want to teach me how to get a picture from another blog to show up on my blog? I'm obviously not blog/internet savvy... yet. (I should probably just ask my husband. But he's too busy!)

Thursday, October 8, 2009

King for a Day

Happy 4th Birthday, Buddy! We love you!
(Poor guy, was sick on his birthday. He had to celebrate it many days later.)

This little man really makes life fun around our house. He's always making us laugh... he's always laughing himself. He loves to run around and jump off the couch (and anything else). He loves to climb and seems to have no fear. He LOVES babies. Especially ones that are the same age as his baby sister (so, I guess it's always changing). He runs right up to babies, where ever we are, and gets down at their level and right in their face and says, "Hehe. Hi, Baby!" and then hugs them. He loves trains! He has Geotrax and he plays with them almost every day. He likes to build "the biggest track in the world"! We are so blessed to have this guy in our family. :-)


On a side note: I made this felt crown, worn by the birthday boy, for a Sharing time skit for Primary a few months ago. When I was making it, I remembered seeing a crown at Cakies and I thought of what a fun "birthday crown" it would be. (Though mine is not nearly as cute as hers. Mine looks like a Pope hat in the pictures. But I assure you, it has more of a crown look in person.) So, I put velcro on it and made it small enough to fit our baby's head, and big enough to fit my husband's head. So we'll all get a chance to wear it on our birthday!

Thursday, June 18, 2009

Homemade Pinata


My kids wanted to throw a surprise party for their favorite babysitter. They wanted to have a pinata. Those are easy to find around here, but not so cheap. I knew we could easily make one. I looked online for instructions. This is a very novice try at making one. There is definitely room for improvement. I'm sure my kids will want one for every future birthday.

I found these links on About.com after I made ours. There are so many good ideas out there.
Of course Family Fun Magazine has a good one. Here's a video that shows how to make one.


Basically you start with:

A balloon
strips of newspaper
flour
water
a bowl that will fit the balloon

(optional: glue, rubber gloves, decoration for the outside)

Blow up the balloon and tie it. Mix one cup flour and two cups water together (add a few tablespoons of Elmer's glue, if you want). Lay down some newspaper to catch spills. Have the balloon on top of the bowl to make it easier to lay the glued newspaper strips on it. Dip the strips in the flour/water mixture and gently squeeze off excess. Put strips all over the balloon in one full layer, leaving a hole at the top (where the tie is) as big as a fist.


Allow that layer to dry and add another layer. Repeat until you have at least three layers. The more kids (or older) you will have at the party, the more layers you may want to have. It took our pinata about 7 hours to dry completely after each layer (we live in dry AZ, though - everything dries faster).

My kids decorated the pinata with dad (while I went grocery shopping). You could decorate it any way you like. I saw one video online that just had the final layer of paper as colorful construction paper in a mosaic design. Very pretty.

When you are ready to fill the pinata you could put some extra newspaper inside with the candy. We didn't completely fill the hole. We just put the candy and paper inside until it was full, then stuffed some tissue paper at the very top. This way the candy wasn't flying out the top. I'm sure you can come up with ideas to cover the hole better. I was lazy.


When it came time to whack at the pinata we used a hole punch to put two holes in the sides and didn't have twine (we were at a friends' house and we forgot our twine) to use, so we used a bungee with hooks. It worked, but ended up ripping through the pinata. We made some bigger holes down lower. That worked better, but looked silly. Oh well. The kids loved it.